
Hosting a Project on Forge
Laravel Forge makes hosting a project super easy, but there are some things worth going over to make sure everything is done correctly.
Prerequisites
- You will need access to Laravel Forge.
- The project must have a domain set up on Cloudflare pointing to
134.209.65.245. - The project will require a repository hosted on GitHub.
Create a New Site
The first thing you'll need to do is create a new site. Expand the "New Site" form on the page for the Vegan Hacktivists server:
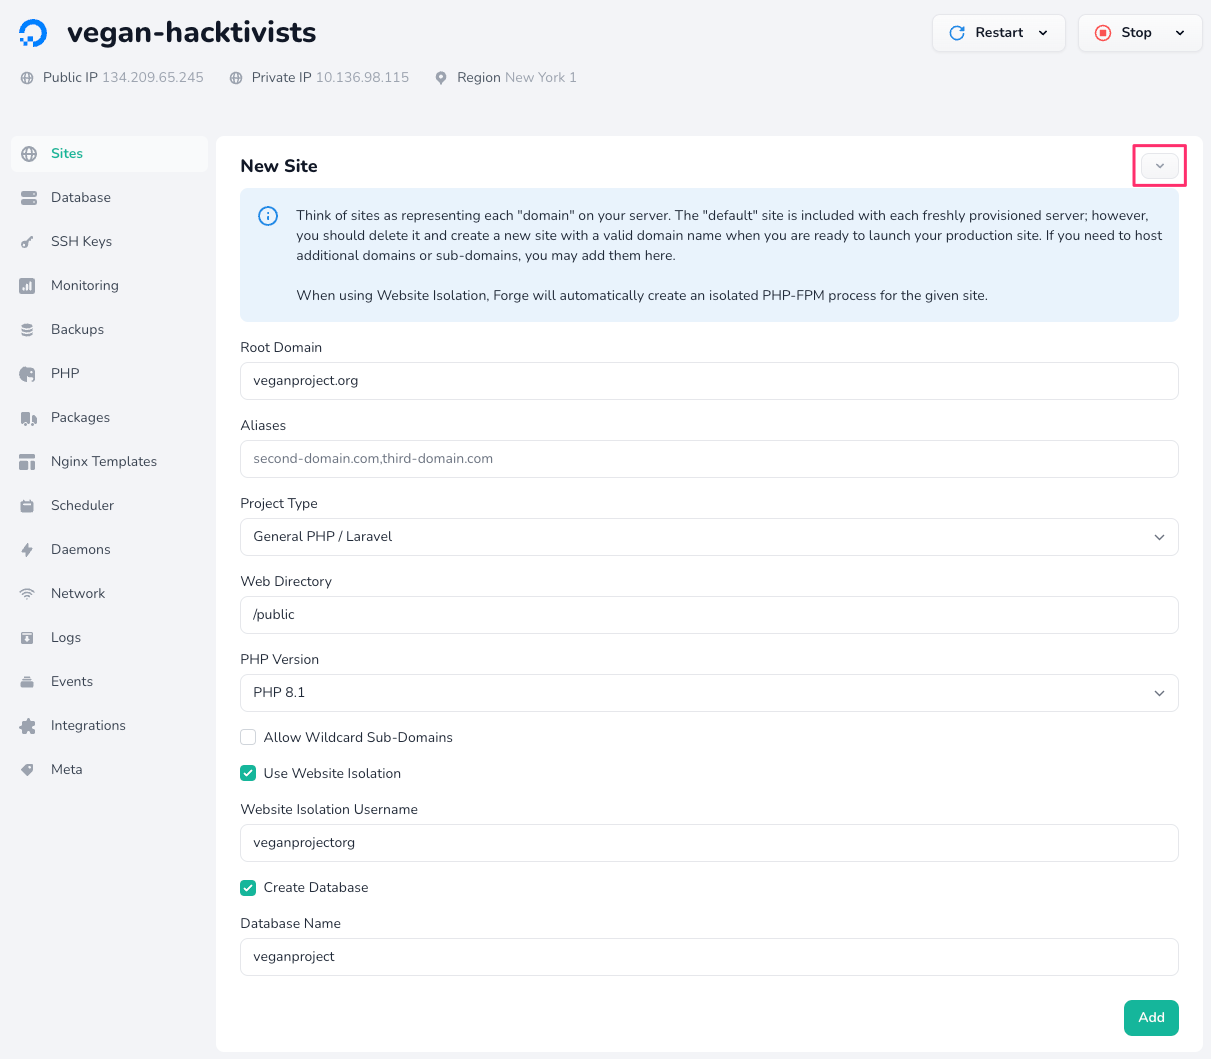
Fill in the form using the project details.
- The "Root Domain" will of course be the domain name associated with the project.
- The "Project Type" will likely be "General PHP / Laravel," but if it's a static website, choose "Static HTML." It will never be any of the Symfony options, and "Laravel Octane" should only be chosen if you really know what you're doing.
- For non-static websites, make sure to check the "Website Isolation" option. This will make sure that the project is running its own PHP-FPM instance, which will help prevent problems from one project affecting other projects.
- In the likely event that your project requires a database, now is a good time to do that. Typically, we name the database after the project name, with no underscores and only lowercase characters (e.g. "Vegan Linguists" becomes "veganlinguists").
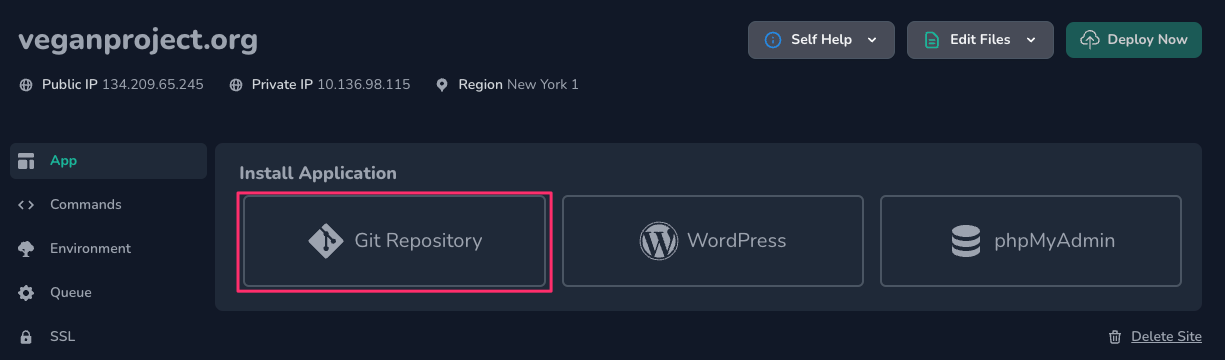
Connect to the GitHub Repository
After creating the project, you should be redirected to the project's page where you can connect it to the GitHub Repository:
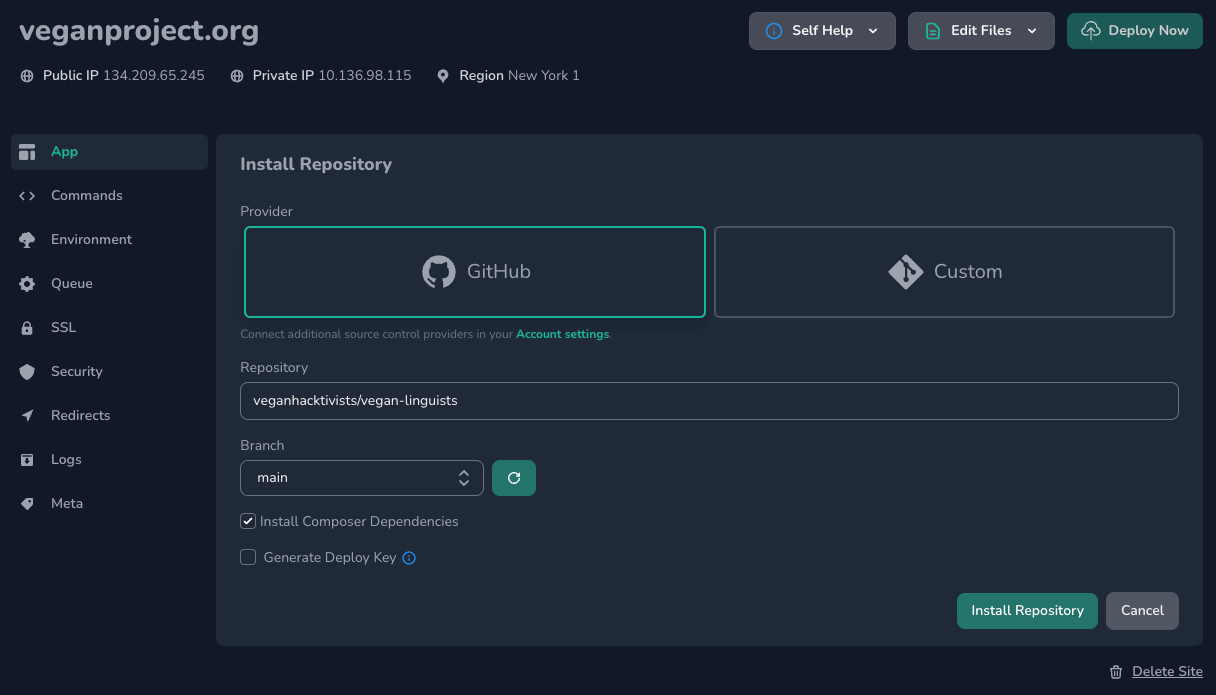
Make sure to fill in the "Repository" and "Branch" fields.
If this is a PHP project, make sure to keep "Install Composer Dependencies" checked. If it's a static website that doesn't require PHP packages, you can uncheck it.
⚠️ Note
Forge confusingly shows main in the "Branch" field, but this is simply placeholder text, and not a default value. You will actually need to choose an option from the dropdown or type in the name of the branch manually.
Once you are done, click the "Install Repository" button.
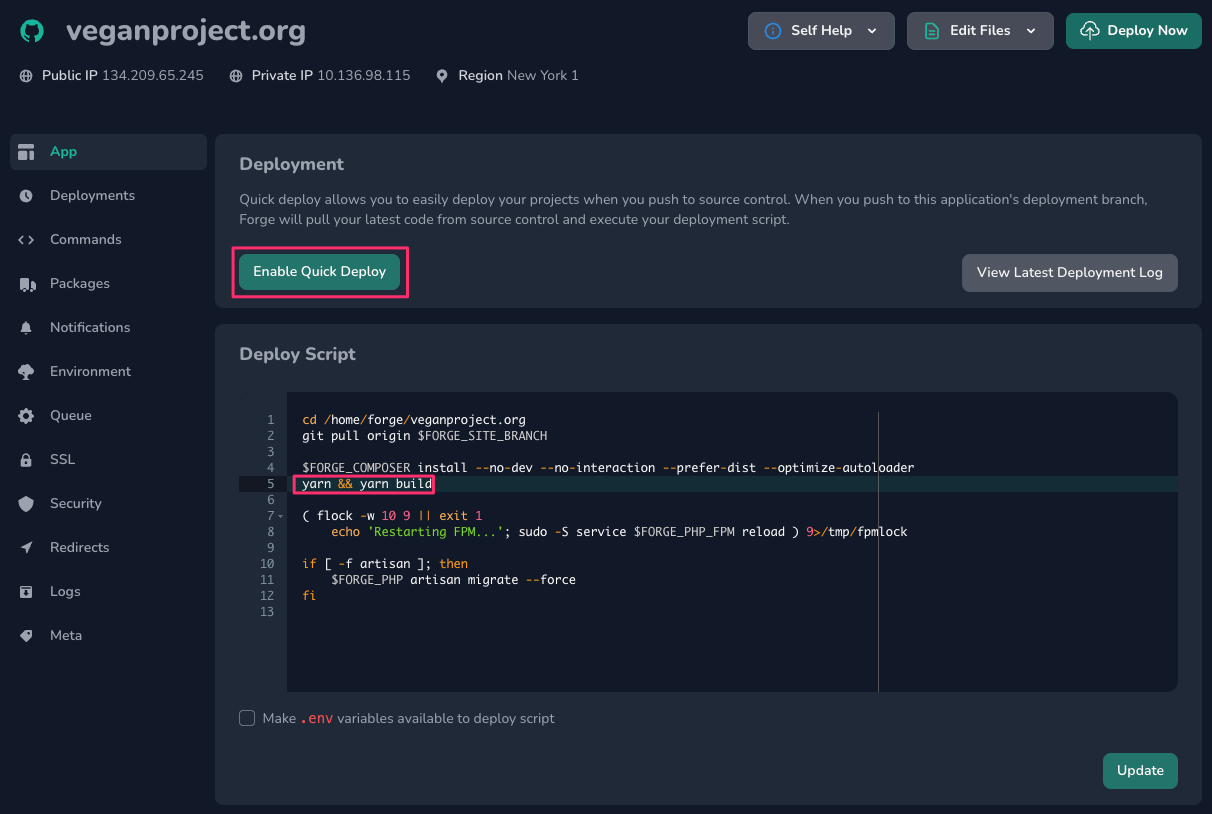
Setting Up Deployment
After the repository is installed, we need to make a quick change to the deploy script. By default, Node dependencies aren't installed and assets aren't built, so we need to make sure all of that happens.
After the line in the deploy script, add the following (or your project's equivalent if production assets are built differently):
yarn && yarn build
Also, you will likely want to click the "Enable Quick Deploy" button so that deployment happens as soon as new changes are pushed to the main branch.
Create a Database User
The next step is to create a user that can access the project's database. Head to the server's databases section and search for the "add database user" form:
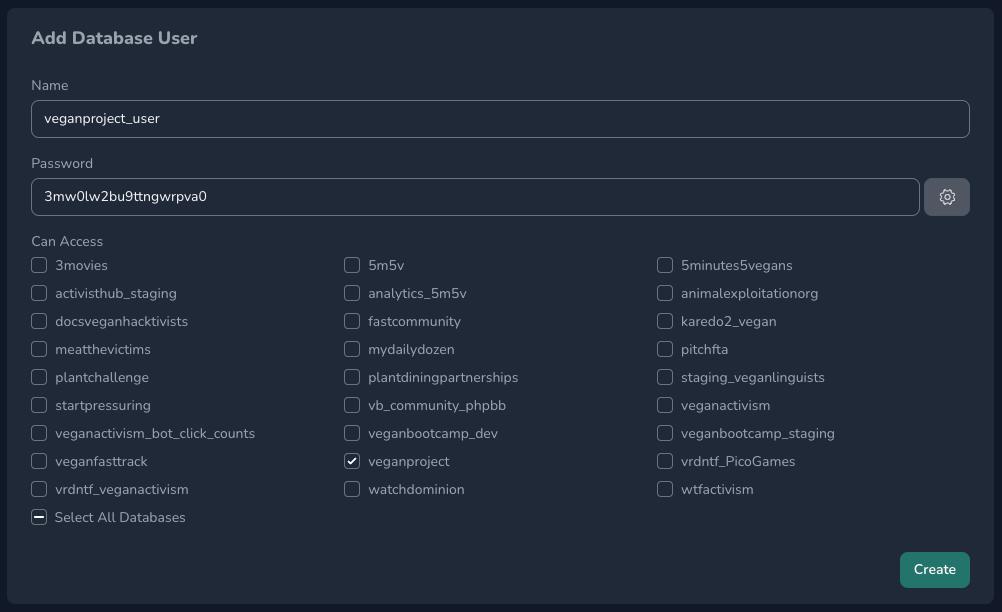
- For the "Name" field, we typically use the name of the database followed by
_user. - Click the ⚙️ gear button next to the "Password" field to generate a password for this user.
- Select only the database associated with the project.
- Copy the password to your clipboard for the next step.
- Click the "Create" button.
Update the .env File
Forge makes updating a project's environment variables very easy. Navigate to the "Environment" section of your project's page and update the DB_Database, DB_USERNAME, and DB_PASSWORD entries:
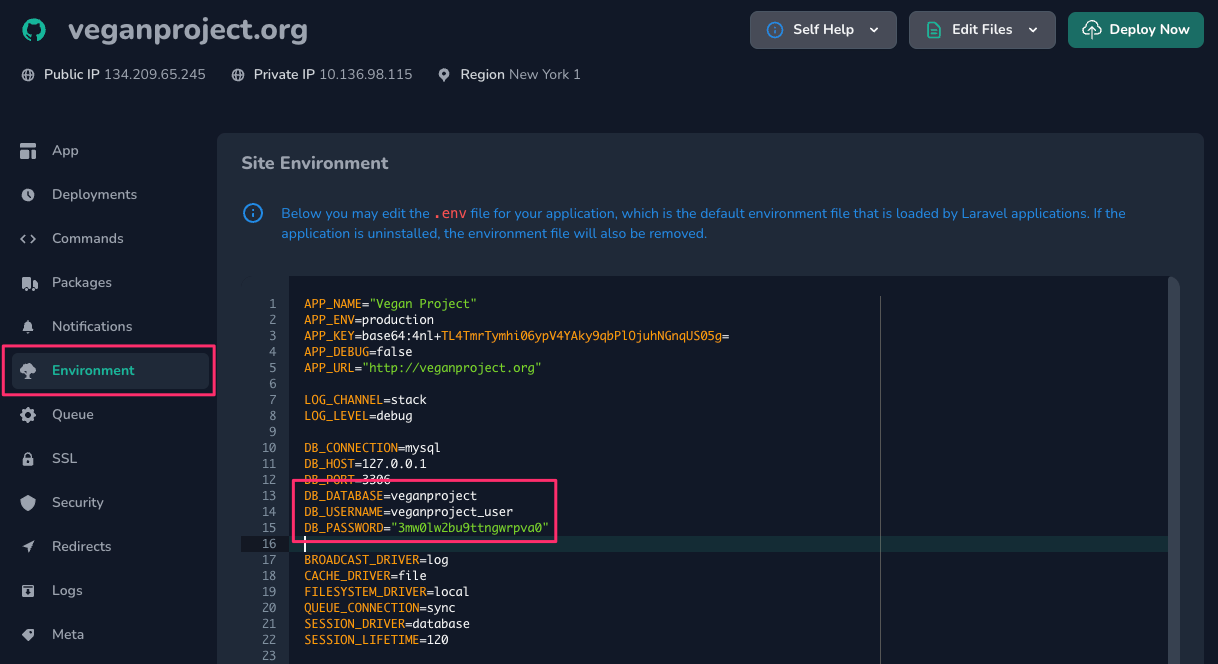
You can, of course, modify other variables, but the defaults should be good for most projects unless you know what you're doing! The main exception would be the MAIL_ variables, which we cover elsewhere.
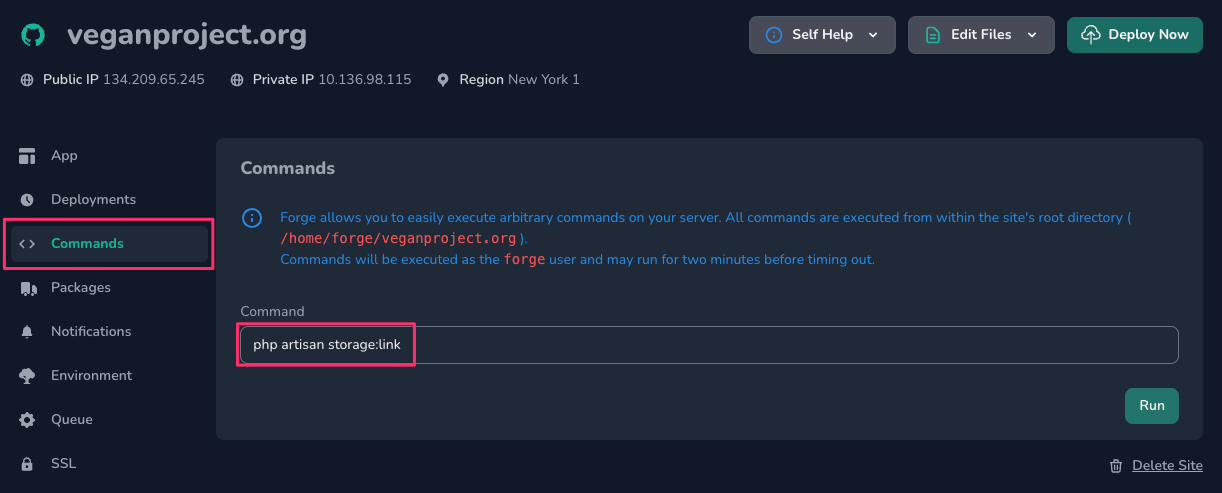
Set Up the Storage Directory
Laravel handles uploaded files using a symlinked folder, which is something you must set up yourself. Luckily, there is an artisan command to do this, which we can run directly from Forge.
Head to the "Commands" section on your project's page and choose the php artisan storage:link command from the dropdown menu, then click "Run."
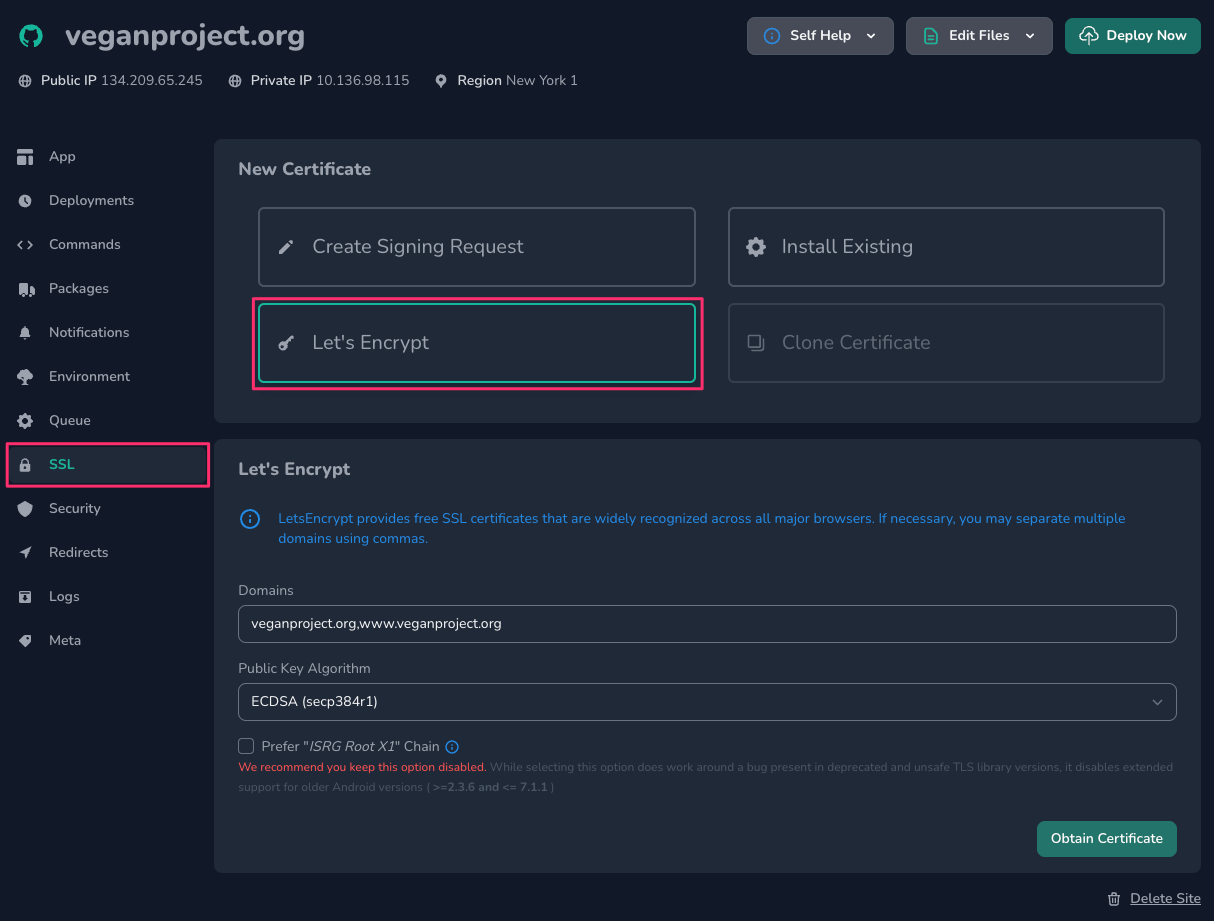
TLS
The last step is setting up TLS, often [incorrectly] referred to as SSL. Navigate to the "SSL" section, click "Let's Encrypt," and then "Obtain Certificate." There should be no reason to make modifications to the default values.
⚠️ Note
If the domain has not been propagated, the certificate creation may fail. In this case, try again immediately, and if it fails again, try waiting an hour or so. If it continues to fail, double check to make sure that everything is set up correctly on Cloudflare.
That's It!
You now have a project hosted on Laravel Forge!
No Comments