
Setting Up Zero-Downtime Deployment
When deploying a project, it can lead to temporary downtime for the production application. In order to avoid this, we use Laravel Envoyer to set up zero-downtime deployments.
Which Projects Are Elligible?
Before explaining how to set things up, something worth noting is that we shouldn't be setting this up for every single project. The amount of apps that we can use Envoyer for is limited based on how much we pay, so it should only be used for our most important projects.
Do not set up Envoyer for the following types of sites:
- Small projects, especially those with little traffic
- Static websites and front-end only applications (i.e. no PHP)
- Staging environments
Also, the project should be set up on Laravel Forge before being set up on Envoyer.
Create the Project
With that disclaimer out of the way, let's do this thing!
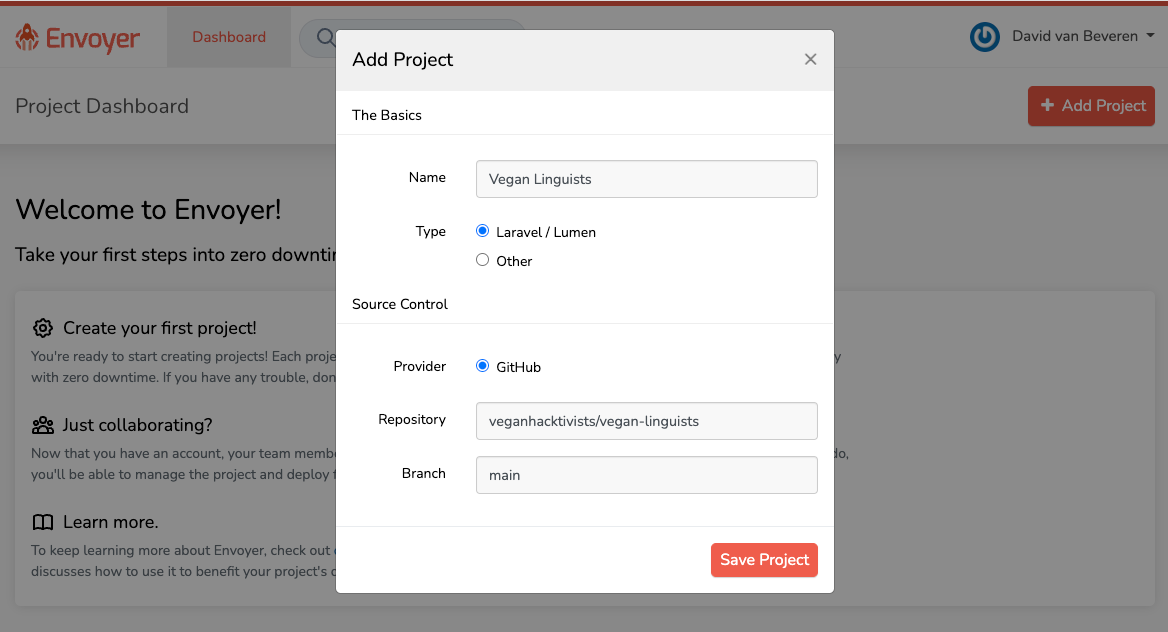
First, you'll need to be logged into Laravel Envoyer with the admin account. On the dashboard page, click "Add Project" and fill in the details of the project's GitHub repository:
⚠️ Note
Only team leaders have access to the Laravel Envoyer admin account credentials. If you are a team leader without access, ask one of the Directors to add you to the veganhacktivists.admin team on Keybase. If you are not a team leader, have them set this up for the project.
Next, we'll need to import the site from Forge. Head to your new project's page, open the "Servers" tab, and then click "Import Forge Server":
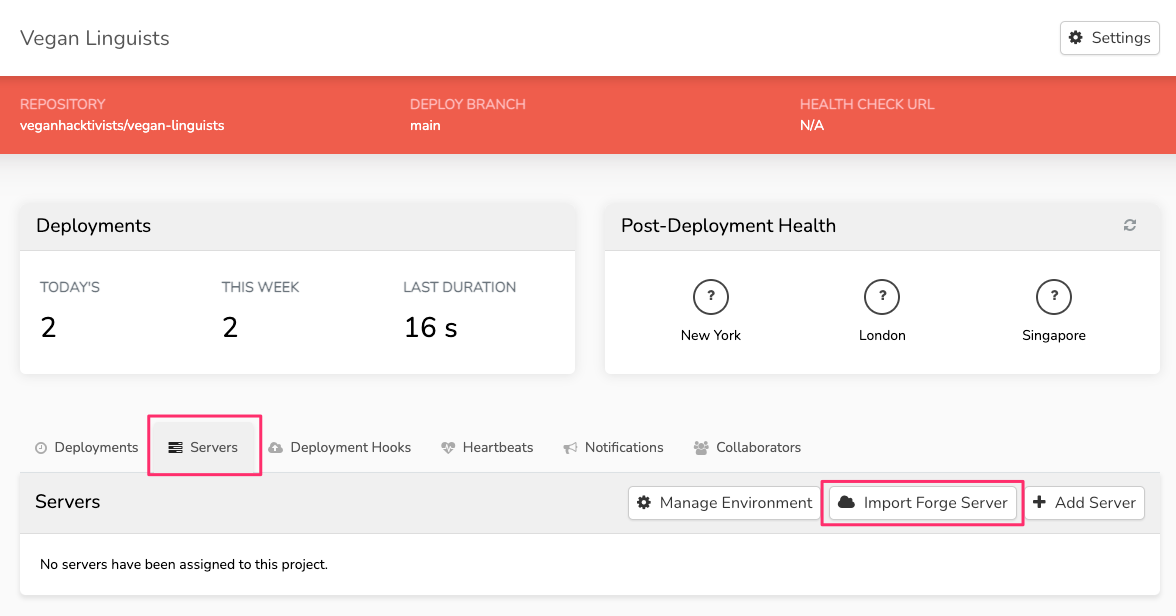
Select the vegan-hacktivists server, select the project from the list of sites, and then click "Import Server."
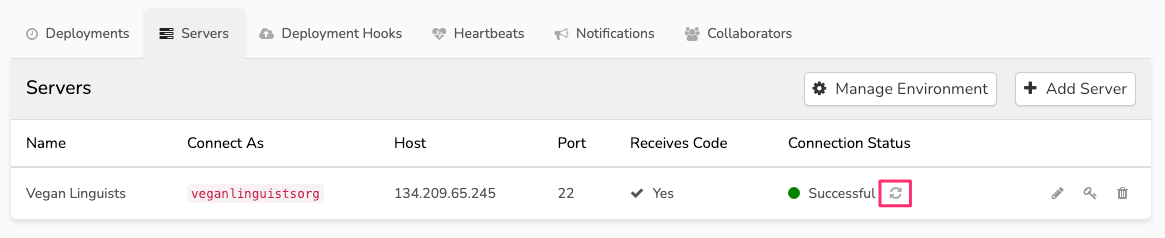
Once this is done, click the refresh ? icon under "Connection Status" in Envoyer:
⚠️ Note
You may see a warning that PHP-FPM was unable to be restarted:
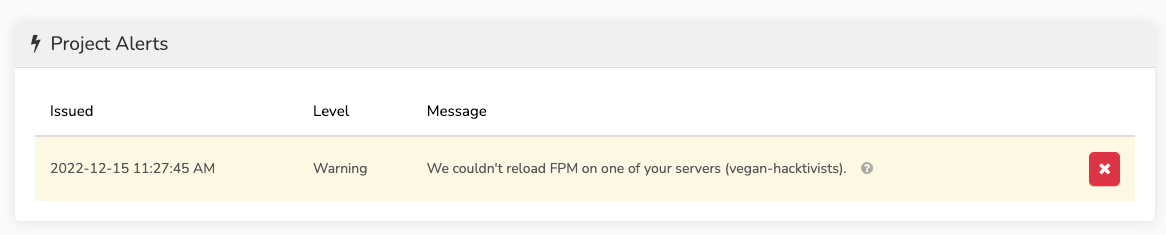
If you run into this, it's likely because Envoyer set up the project with the wrong PHP version. Check the site on Forge to see what version of PHP the project is using. Then, click on the pencil ✏️ icon in Envoyer to set the correct PHP version for the project. After that, click the refresh ? button again and all should look good!
Copying From Forge
While we've imported the site from Forge, there are still some things we'll need to do manually in order to complete the Envoyer setup.
Disable Quick Deploy
The first thing we'll need to do is disable "Quick Deploy" if it's enabled. Head to your project's page on Forge and make sure it's disabled:
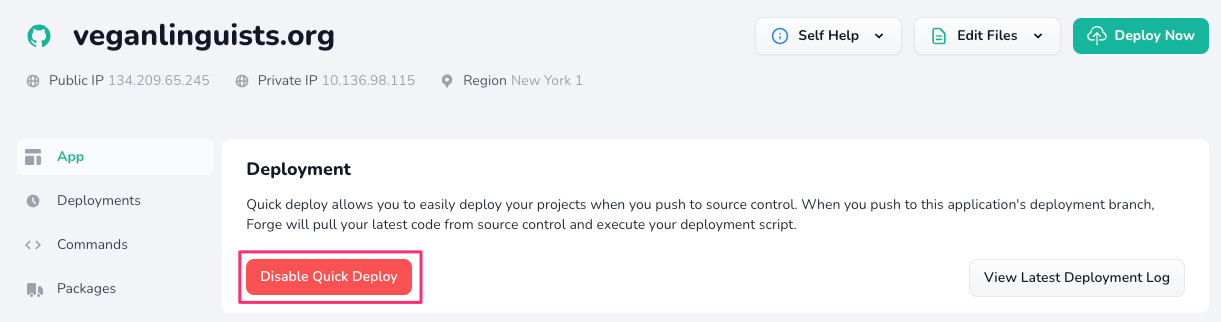
We're disabling this because we'll no longer be deploying using Forge. To get the equivalent functionality for the new deployments, head to your project settings on Envoyer:

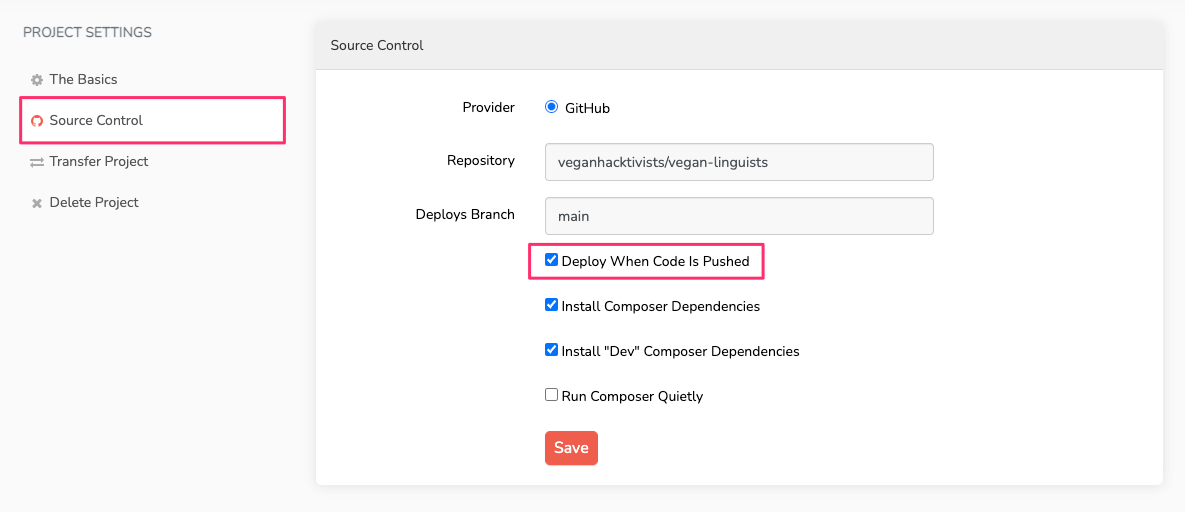
Then, head to the "Source Control" tab and check "Deploy When Code Is Pushed" and save the project settings:
Setting Up Deployment Hooks
Now we have to replicate whatever is in our deploy script! First, take a look at what's currently there on Forge:
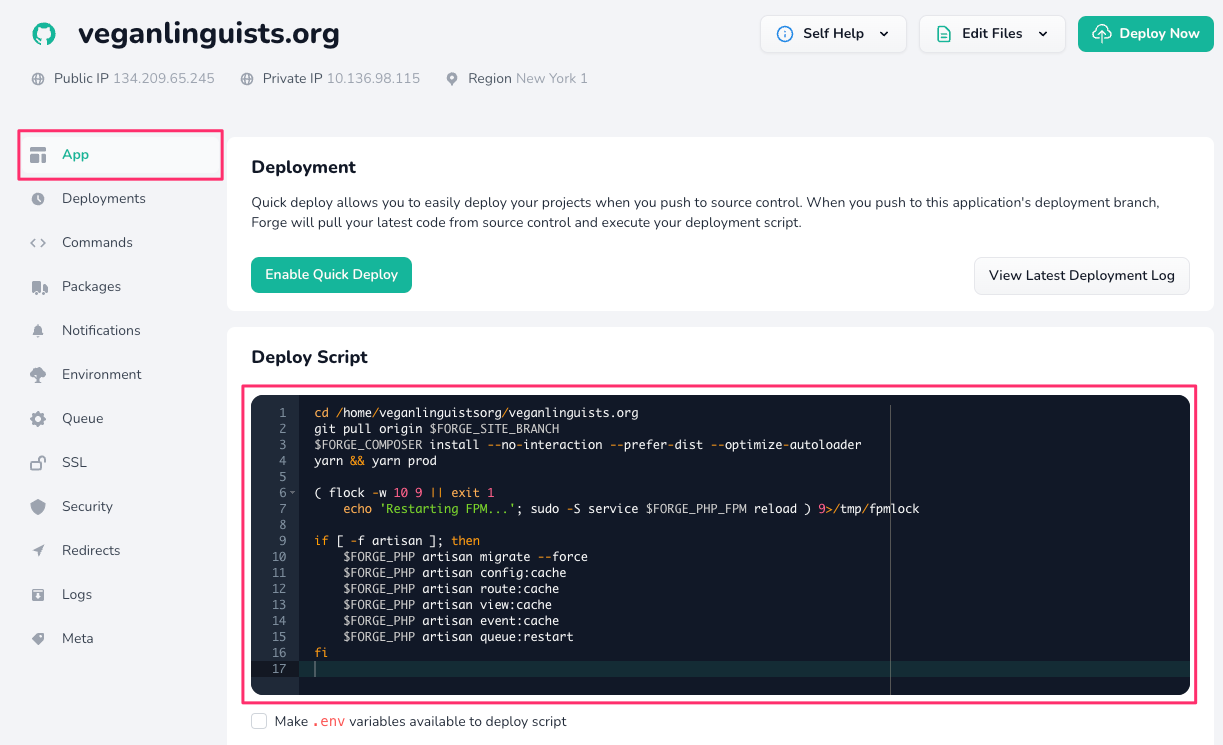
Keep that tab open and head over to the "Deployment Hooks" tab on your Envoyer project page:
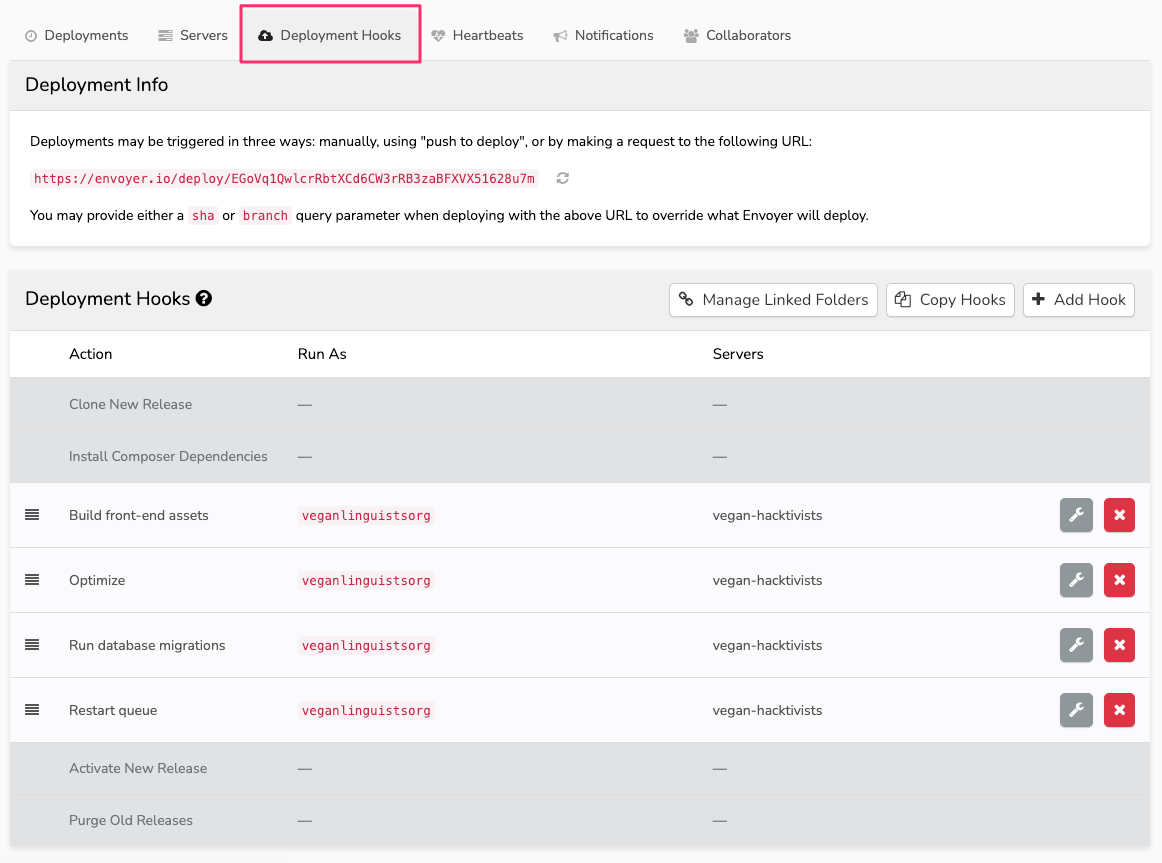
If you are just setting up the project, you will have four immutable hooks (the ones with a gray background). These are managed by Envoyer, but they are likely not enough to cover all of the deployment process, so we'll have to add our own.
Migrating the Deploy Script
In order to start adding hooks, click the "Add Hook" button. More-or-less, you'll want to consult your deploy script on Forge.
Do not write hooks for the following:
- Pulling the Git repository
- Installing Composer dependencies
- Restarting PHP-FPM
Also, make sure that the "Run As" field is the username associated with the project. This can be checked on the sites page on Forge:

Below are some examples which should suffice most projects, but of course, refer to the deploy script to be sure. Refer to the Envoyer screenshot above to see the proper order for these hooks.
Note that {{release}} is a template variable for deployment hooks which refers to the directory of the latest release.
Build front-end assets
cd {{release}}

yarn && yarn prod
Optimize
cd {{release}}

php artisan optimize
Run Database Migrations
cd {{release}}

php artisan migrate --force
Restart Queue
This is only necessary if you've set up a queue for asynchronous jobs.
cd {{release}}

php artisan queue:restart
Linking Storage
You may recall needing to run php artisan storage:link when setting up the project on Forge. Since Envoyer uses a new directory for each deploy, we essentially need to run this on every deploy. Luckily, Envoyer has this functionality built-in. Click on the "Manage Linked Folders" button and fill in the the form.
If you have not modified the default filesystem storage config, then fill in the following:
-
Create Link At:
public/storage -
To Folder:
storage/app/public
This corresponds with the filesystem config in your project's repository (config/filesystem.php):
<?php
    // ...
    'links' => [
        //   public/storage            storage/app/public
        public_path('storage') => storage_path('app/public'),
    ],
    // ...
If you're unsure, consult the config file to see which directories you need to link!
Updating the Scheduler
If your project makes use of scheduled tasks, then there is one more thing to do before completing the deployment setup, which is updating the directory where the scheduler runs.
Head over to the "Scheduler" section for the server on Forge and copy the scheduler command for your project:
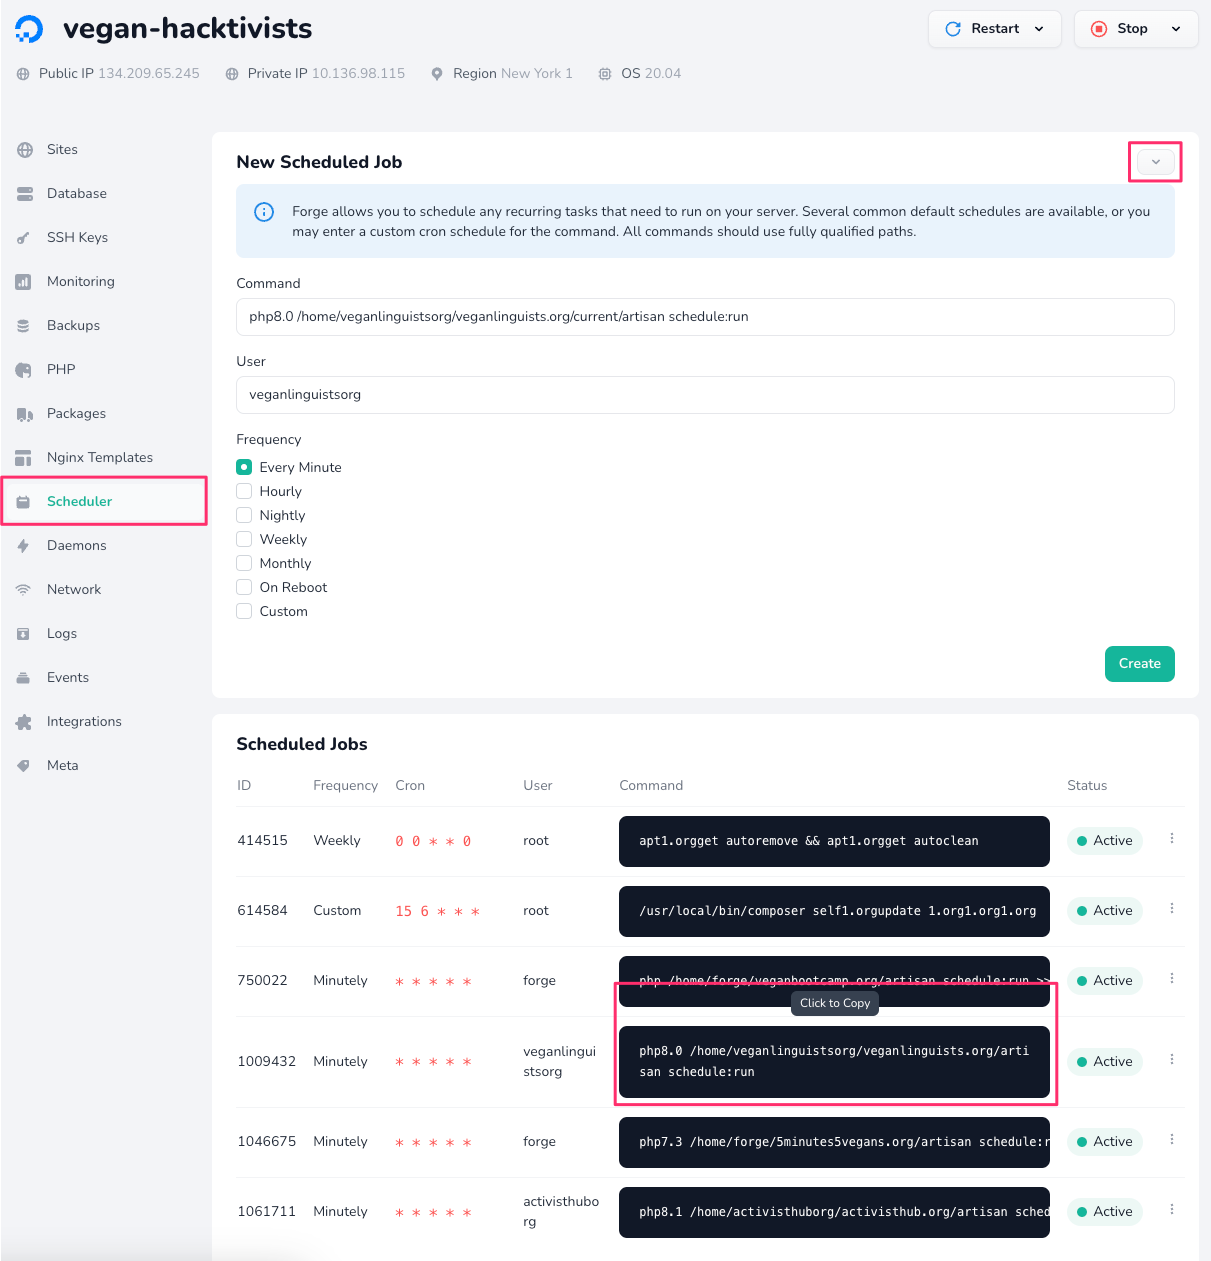
After copying the command, create a new scheduled job and paste that command into the "Command" field. Make sure that the "User" field matches the user running the existing command as well.
Important: After copying everything over, update the "Command" field so that artisan is run inside the current directory. For example, if your command was previously:
php8.0 /home/veganorg/vegan.org/artisan schedule:run
Change it to:
php8.0 /home/veganorg/vegan.org/current/artisan schedule:run
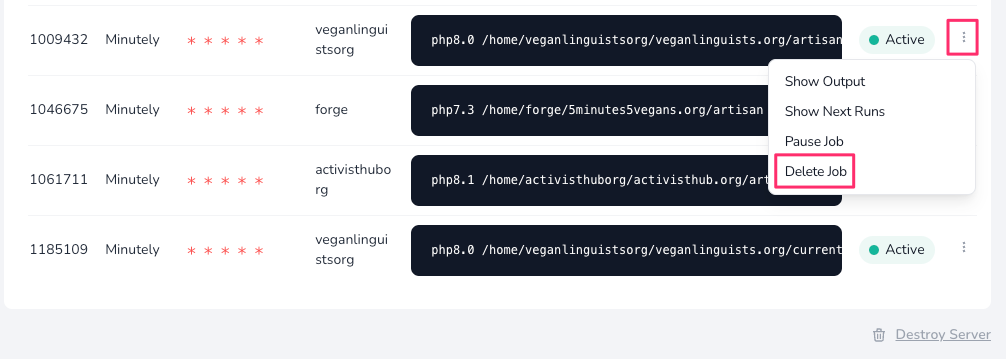
Create the new job and then delete the old one:
Wrapping Up
There's only one more thing we need to do in order to complete the setup, which is updating the directory serving our project.
To make sure the transition is as smooth as possible, deploy the application via Forge first:

Once it's done, open the "Meta" tab for your project on Laravel Forge and prepend the "Web Directory" with /current:
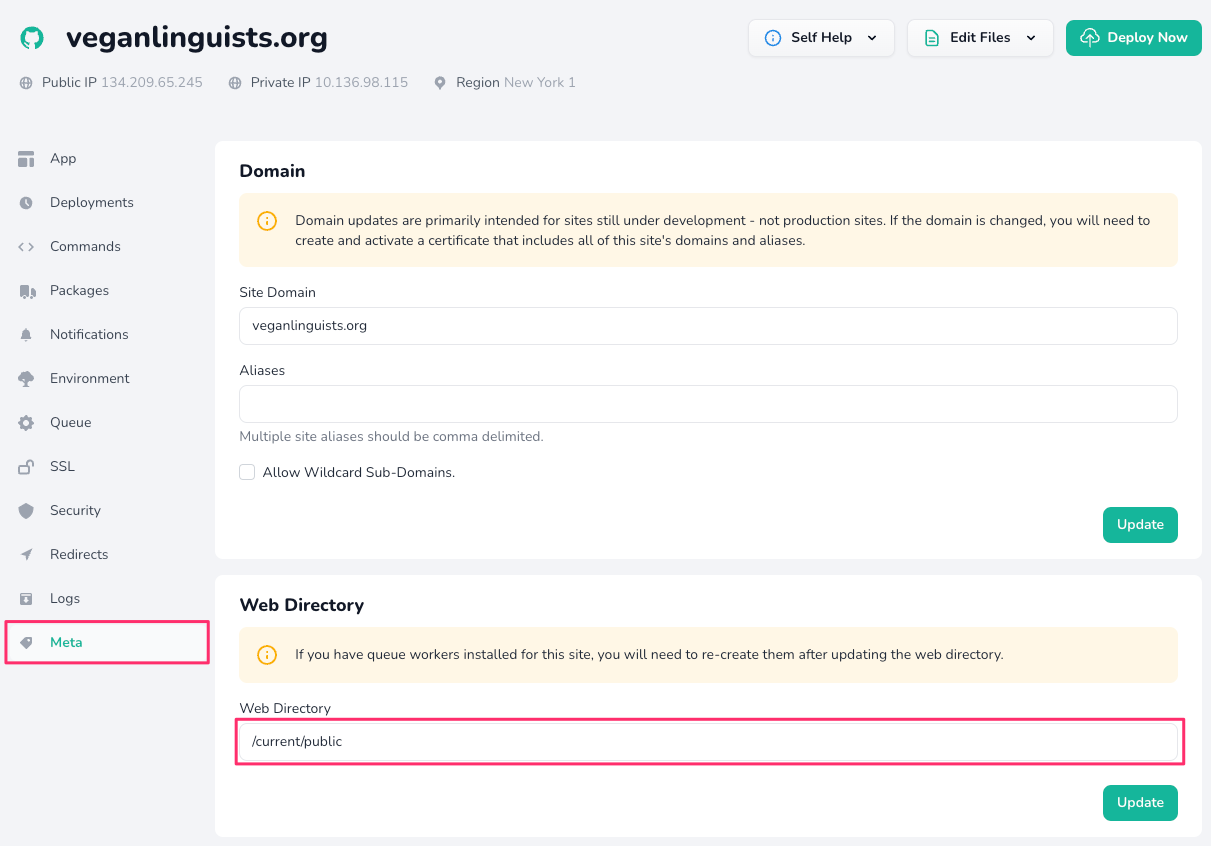
Wait a few seconds and then visit the site. If it loads, then you should be good to go! If you get an error, then revert the "Web Directory" change and debug using the logs on Laravel Forge.